Skip to Content
Automower® support
Adjusting the cutting height on Automower® Aspire™ R4
Automower® Aspire™ R4 offers three cutting height levels - low, medium and high - which you can set by repositioning the blade disc screws. Follow the step-by-step guide below to adjust the height to your preference.
Available cutting heights
You can select between 3 different cutting height steps. The blade disc has a mark for each step.
Step 1 is the lowest height: 20 mm (1-3/16 in.)
Step 2 is the middle height: 35 mm (1-3/8 in.)
Step 3 is the highest height: 45 mm (1-3/4 in.)
The factory setting is set to 3.
Step-by-step: How to change the cutting height
Important: Always turn off the mower and wear protective gloves before performing maintenance.
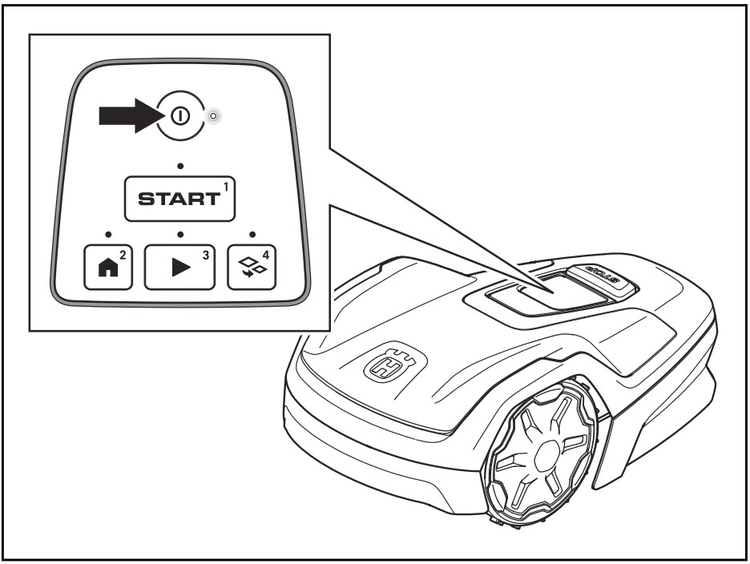
1. Power off the mower
Turn off the mower: Push the ON/OFF button for 3 seconds.
Ensure the LED indicator on the ON/OFF button is off.
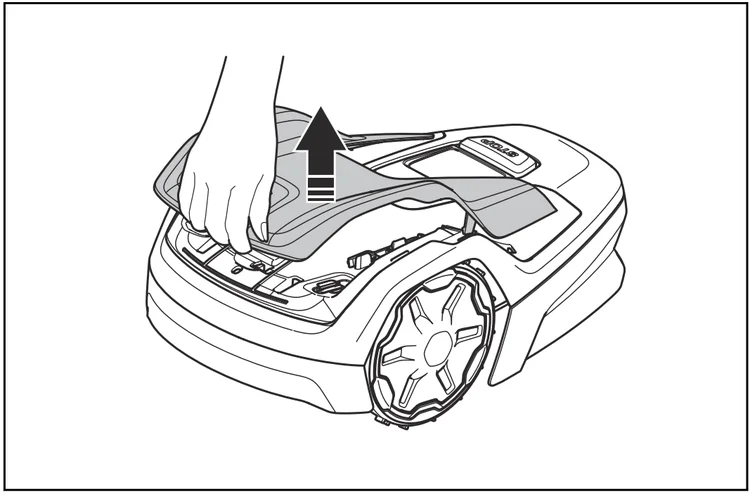
2. Remove the top cover
Lift the front of the top cover and carefully remove it.
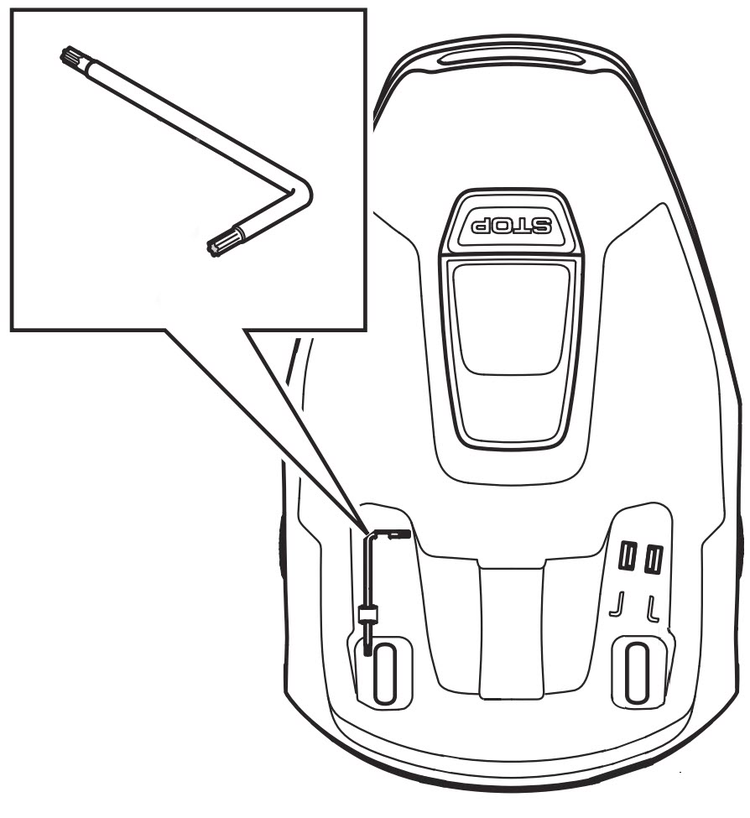
3. Locate and remove the torx key
Find the torx key stored on the mower body and remove it.
4. Flip the mower
Turn the mower upside down to access the underside.
Wear protective gloves before proceeding.
5. Remove the blade disc
Use the torx key to remove the two blade disc screws.
Remove the blade disc.
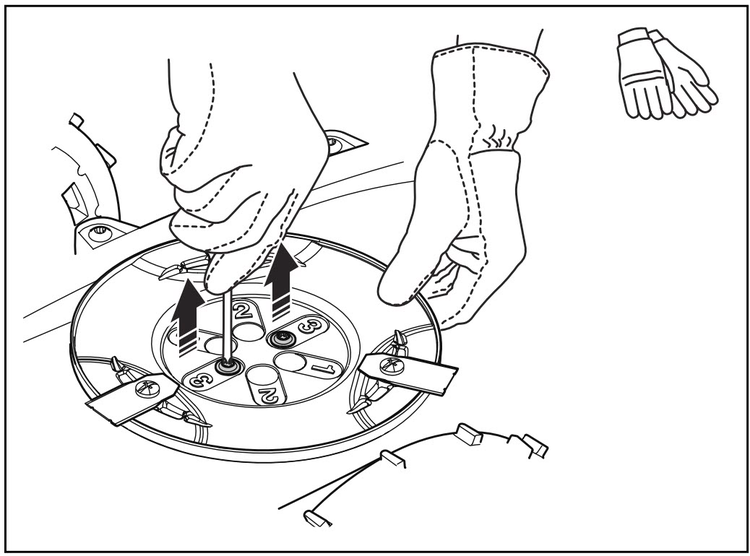
6. Reposition the blade disc for desired height
Select a cutting height (1–3).
Align the blade disc holes with the matching holes on the shaft.
7. Reattach the blade disc
Insert and tighten the two blade disc screws using the torx key.
Make sure the blade disc is securely in place.
8. Reinstall the torx key
Place the torx key back into its holder on the mower.
9. Attach the top cover
Attach the top cover back to the mower.
Tip: The first weeks after a new installation, set the cutting height to 3 to prevent damage to the loop wire. You can then lower the cutting height each week.